![]()
Spotlight: Xerox
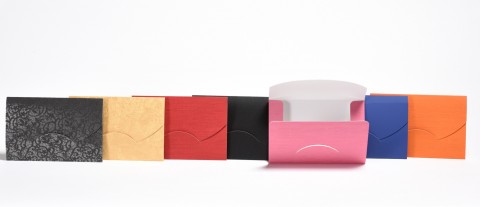
While there are many ways to bring your designs to life in print, none captures the eye nor sparks the imagination quite like the use of clear ink. Whether you’re adding a little extra pizazz to a cosmetic folding carton or enhancing images or logos on direct mail or brochures, “clear” always compels your audience to take another look. And when you’re printing digitally, the clear choice for that attention-getting sheen is the Xerox iGen 5 Press using Clear Dry Ink in its game-changing 5th print station.
Clearly Brilliant
We’ve all been there. You have a client you really want to wow, but their modest budget is standing between you and all the techniques you’d normally turn to for that little something extra – foil stamping, embossing, even die cutting are just a tad too expensive. Yet your client has opted for digital printing, which means a whole new world of printing possibilities has opened to you.
By insisting on a print service provider (PSP) that uses the Xerox iGen 5 Press, you can now design your piece with Clear Dry Ink in mind. Its effect is always clean and elegant – simply use it in the same way you’d use a spot varnish, creating a subtle-but-compelling contrast between your artwork and the paper it’s printed on. Your PSP simply loads the first four print stations of their press with cyan, magenta, yellow and black, and the 5th with the clear option. (By the way, for another fabulous use of that 5th print station, click here.)
![]()
With Clear Dry Ink you can now:
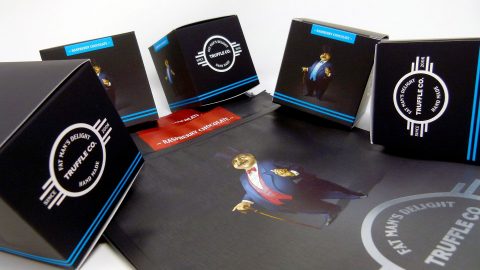
- Infuse artwork with new life. Struggling to get across on a folding carton the lusciousness of the premium chocolates within? Add a touch of Clear Dry Ink to make the images on the box look scrumptious enough to eat.
- Call attention to specific text. Have you designed a piece of direct mail that personally addresses the recipient by name in big letters on the front? They still might miss that fact if it’s printed in CMYK, but how can they help but notice it if they see their own name shining at them from the page?
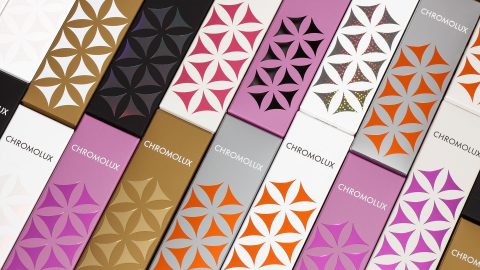
- Make lighter colors pop. Clear Dry Ink increases the saturation of light colors, really making them stand out.
- Apply watermarks to enhance security. Printing tickets to a concert, sporting match or other event likely to be targeted by counterfeiters? Use Clear Dry Ink to include watermark designs and unique numbers to ensure only paying customers gain entry.
- Make your client’s logo stand out. Are they struggling to get noticed in a crowded marketplace? A coat of Clear Dry Ink will make their logo impossible to miss.
- Simulate a metallic sheen. Just because you can’t afford foil stamping doesn’t mean you have to give up shine altogether. Clear Dry Ink can give you that metallic or pearlescent glimmer that your audience naturally associates with premium quality.
- Add subtle design elements. Ever looked at a piece, turned away, only to reexamine it convinced that you missed something the first time? That’s just what you can make your audience do by printing some of your artwork in Clear Dry Ink. You can do something as simple as adding a watermark design to create an artistic effect on a wedding invitation.
- Create in-store displays that wow. When used in conjunction with Thick Stock Capability, the iGen 5 can apply the Clear Dry Ink to a whole host of thick-stock items – up to 24 pt. – including signs, folding cartons, business cards, merchandise tags and more.
![]()
Clearly Easy to Use
The only thing more impressive than the results of using this feature of the iGen 5 is the fact that it couldn’t be easier to work into your design files. Simply:
- Add a second layer in the “Layers” palette of InDesign and call it “Clear.”
- Add a new color in the “Swatches” palette and name it “Clear.” (Designate it as a CMYK Spot Color.)
- Fill the shape you’re working on with the new “Clear” color swatch.
- Import vector graphics, draw and fill a shape, or select text that will have the Clear Dry Ink applied. (Make sure all elements that you want to print with “Clear” are placed on the “Clear” layer.)
- For graphics imported into InDesign, choose Multiply; for those created within InDesign, choose Overprint.
- Save your file and export it as a high-resolution PDF.
Getting the feeling that the Xerox iGen 5 Press makes creating amazing design work amazingly easy? Why not grab your free guide to designing for the iGen 5 right here? In it you’ll find everything you need to know, all in one place.
Eager to see what this whole clear ink technique looks like in real life? [CLOSED] Enter to win one of 50 Clear Dry Ink posters right now! It features a super tall stack of flapjacks on one side just glimmering with organic honey, and a thoughtful yogic observation on the other. Hurry, contest ends Oct. 11th!