By Alyssa Hoffman
Editor’s note – If we’ve learned anything from the recent HOW conference, it’s that you can never have too many business cards. And if you want your cards to stand out from the small forest of the things that get passed around these little hootenannies, nothing raises the eyebrows quite like edge painting.
We love designer Alyssa Hoffman’s approach to the subject – the same do-it-yourself ethos driving the whole letterpress resurgence today – minus the investment and storage issues. And working day in and day out on computers, sometimes it’s just nice to get your hands a little dirty.
When I went to purchase my business cards a few weeks ago, I knew that I wanted to jump on the painted-edge trend I’ve been seeing everywhere. Knowing that I couldn’t/didn’t want to spend a ton of money on my first round of cards, I searched high and low for the cheapest option using a “big box” website. I hope to work with a small letterpress shop soon, but for now I just needed something cheap and fast.
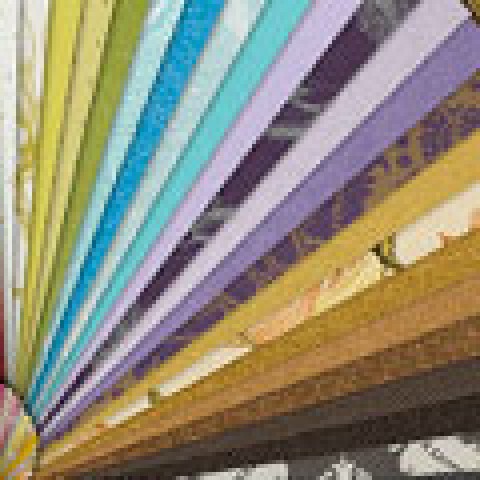
MOO has a few options for edge-painted cards, but the colors are limited and I wasn’t into their color choices at all. I did, however, stumble upon their LUXE line of cards that come in a heavier weight/thicker stock than their regular card offerings. I ordered them and decided to take a stab at edge painting myself.
I Googled a few different tutorials and kind of adjusted the steps to what I thought would work best for me. I wanted something less risky than most of the tutorials I’ve seen around the Web. I didn’t want to ruin my cards for my first DIY attempt at this – the whole spray paint option is SCARY! My cards turned out FANTASTIC, so I wanted to share what I did with you guys!
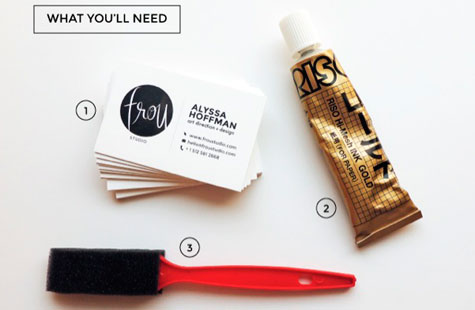
You will need:
- Business cards. The thicker the card stock, the more the color will pop. For mine, I used MOO’s LUXE cards. When I do decide to go the letterpress route, I will look for thicker stock. For now, you can’t beat MOO, and the LUXE cards were thick enough to work just fine.
- Ink. I used Riso paper ink used in gocco printing. I figure you can’t go wrong with ink that is specifically used on paper for crisp lines and fine detail. I purchased mine from Etsy seller printaddictjapan. This shop has LOTS of color options! Since this ink worked out so well, I will be purchasing some of the neon ink soon.
- Sponge brushes
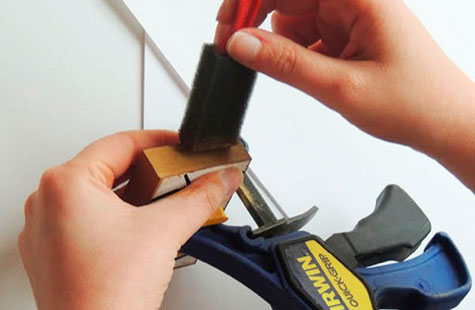
- Clamp. If you don’t have a clamp or don’t want to purchase a clamp, a heavy book or rock will do. However, I truly think the reason my cards turned out so well was because of the clamp. Once the cards were secured, there was NO shifting, resulting in very minimal bleeding and crisp painted edges. Also the clamp was easy to rotate and maneuver to make sure all edges were thoroughly painted. They only run about $6 at Home Depot.
1. First, I stacked all of the cards together and rotated sections as needed to get them as flush as I could up against one another. Note that the top and bottom card that you use will be ruined. I kept the top and bottom card from the first round I did and will continue to use them in the future to sandwich edging projects to keep wasted/ruined cards to a minimum.
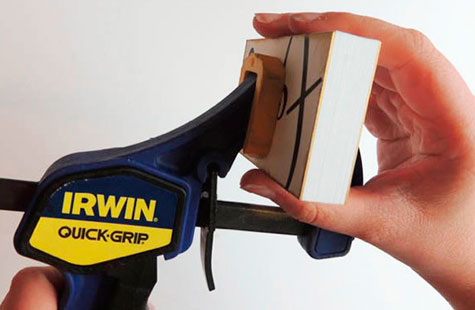
2. Once I felt I had the cards stacked well, I pulled out my clamp and wedged the stack between the clamp’s teeth. I think this step is THE MOST IMPORTANT one. I spent a good five minutes working with the cards in the clamp trying to get them as straight and even as possible. Any cards sticking out or sinking in will result in ink on the faces of the cards, not the edges. You want to get them as square and even with each other as possible, both horizontally and vertically. Once I felt I had them in a good position, I tightened the clamp tight. You don’t want to see any gaps or shadows between cards – these will result in bleeds. Not good.
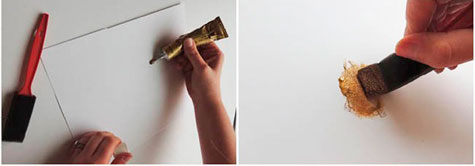
3. I squeezed some ink onto a piece of paper and worked it into the sponge. The first round I did, I tried brushing the ink onto the card edges; the ink looked really streaky and uneven. I found that using the sponge brush correctly and dabbing the ink onto the card edges worked 100 times better and gave good, even, saturated color and coverage. When dabbing, dab LIGHTLY and repeatedly. It will take time to get the coverage you want, but you just have to be patient.
The first time around I did not dab lightly and I’m 100% sure that being rough forced ink between the cards causing a little bit of bleeding. The second round I took my time and did not have a single card that had bleeding on its face. Also when I was dabbing, I squeezed the cards together as I dabbed just to make sure that there were zero gaps between the cards when I was laying down the ink. Thankfully, this ink is quite thick so once you have finished dabbing the ink on the edge and release the pressure from the cards, you won’t have to worry about ink seeping through.
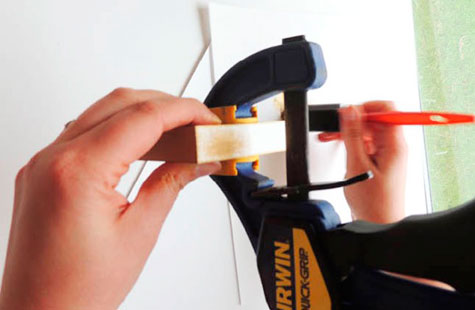
4. After you have finished covering all edges, set them aside to let them dry. I spot checked the edges with my finger after about 30 minutes and they were mostly dry to the touch. I took them out of the clamp and laid them out individually to finish drying, just to make sure I didn’t have any stick together permanently while they dried overnight.
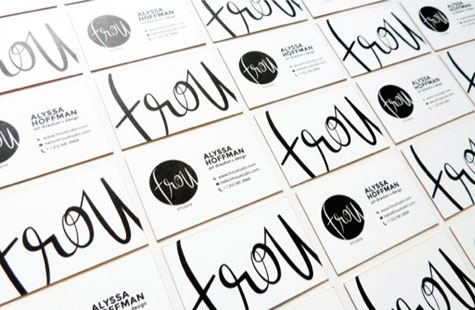
In the morning… VOILA! Edge-painted cards! I am so pleased with the way mine turned out – can you see the tiny pop of gold that peeks out when the card is laying flat? I LOVE them and can’t wait to share them!

……..
 Alyssa Hoffman runs Frou Studio, a small boutique design studio in Austin. There her love for pattern and texture come together to create unique offerings in graphic design and branding, Web design, custom invites and stationery.