By Sabine Lenz
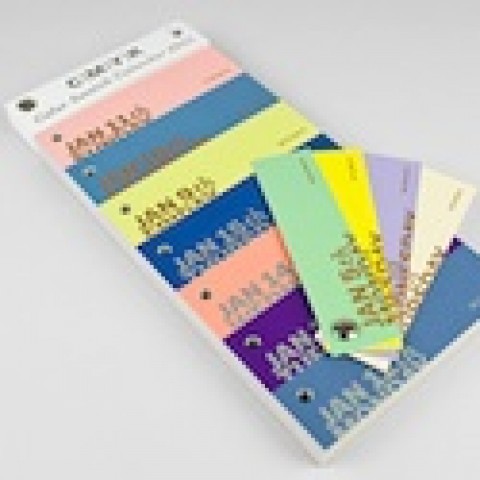
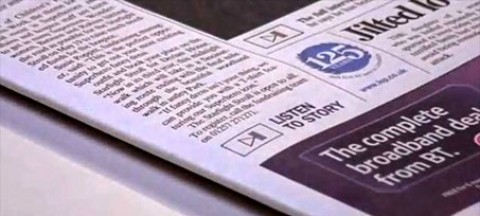
Whoosh! The sheets were coming off the press fast and shiny. Whoosh! Hundreds of metallic tones brought glitz and shine to our project. Whoosh! And all this with one pass through the press … Magic, pure magic. 😉
It all started innocently enough. At a recent visit to Michael Osborne’s design studio in San Francisco, Michael proudly showed me a poster his team had created for Spectrum Lithograph. The piece featured a matte black contrasting with a large variety of bright, shiny, vibrant metallic colors.

I knew right away I was in the presence of something wonderful. This was not your average metallic ink on paper. This was a metallic foil effect, but with hundreds of metallic colors on one sheet. How did they do that?
Wrapped Up in Love
A few months later, I had the chance to be part of the process up close and in person.
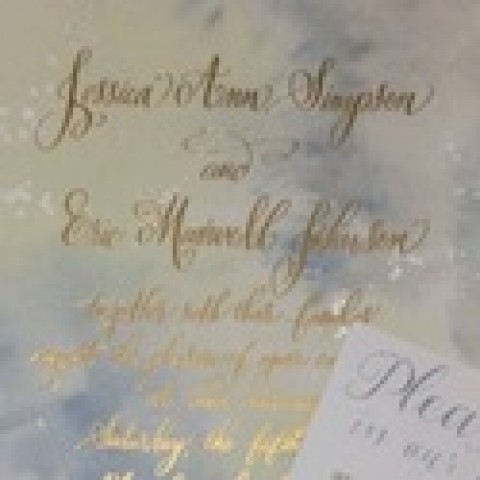
Just in time for Valentine’s Day, MODSF, Spectrum Lithograph and PaperSpecs created several sheets of beautiful, collectible, frameable wrapping paper – wrapping paper that oozes with our collective love for paper and print and is just too beautiful to use as intended.
The Cold Hard Metallic Facts
Around three years ago, Spectrum Lithograph invested in retrofitting its six-color press to allow it to run lithofoil – or cold foil printing as it is also known.
Cold foil printing is similar to hot foil stamping – the process is done on a letterpress, one foil color at a time. Since cold foil does not require the heat or pressure to transfer foil to the substrate, it allows for the extra magic – literally thousands of metallic colors.
At first glance, the retrofitted press looks like your average six-color sheetfed press, but the first two units are reserved for the cold foil process.

The Lithofoil Process
Remember the sparkly pictures you created in kindergarten (using glue to draw a pattern and then sprinkling colorful glitter over the paper)? The glitter only stuck to the areas where the glue was.
Well, lithofoil works pretty much the same way.
The first printing head puts down a specifically designed curable adhesive.
With the second press unit, the foil is then nipped to the adhesive, and the carrier is stripped away leaving the foil covering the paper only where you want your metallics to appear.
From here on, it is your average four-color print run with screens, color builds, or photographic images.
Wherever the foil is underlaid, your colors will magically become metallic – allowing for any shade or highlight your creative mind can envisage.
No Special Inks Required
Cold foil printing works well with your regular offset inks, but Shawn Pereira, VP of Sales and Marketing at Spectrum Lithograph, recommends UV inks.
“The lithofoil process takes longer to dry than your average print project,” says Pereira, “as the ink sits on top of the foil, which sits on top of the paper. The UV process cures the inks right away and allows us to move into the finishing stages of the piece much faster.”
Pereira also recommends adding a UV coating on top of the metallic areas to avoid possible scratching.

Not Any Paper Will Do
The cold foil process requires a coated sheet. Theoretically gloss or dull are fine, but …
“The smoother the surface, the easier the foil sticks to the paper, and the better the results,” explains Pereira. “We recommend balancing the paper weight with the amount of metallic surface you want.”
As with any specialty process, lithofoil puts extra printing stress on the paper. The more metallic area you want, the more foil needs to be put down. The more foil you put down, the more stress on the paper. The more stress, the heavier your sheet should be.
With our wrapping paper project, we pushed the process to its limit and our paper (80 lb. McCoy Gloss Text) to the extreme test with a lot … and I mean A LOT of metallic surface. The McCoy did it. 😉
 Waving the Magic Designer Wand
The lithofoil process sounds rather easy to understand and implement, and it is. Even in the design and production phase. There is no need for any special software to create your final artwork. InDesign, Illustrator, any software that allows for a spot color works perfectly.
Set up a special layer and add the metallic areas as you have them in mind.
This spot color will be your foil plate, giving everything that sits on top of it the amazing metallic shine. From full spot areas, to gradations all the way down to 0.25-point lines.
Just wave the magic wand and let your metallic imagination run free.
Press checks are recommended, but then again, I always encourage you to attend these. 😉 If you cannot make it, the provided proofs (at least in our case) came very close to the results we saw on press.
 The Cost of Lithofoil Magic
I know what you’re thinking. What about my budget?! There is, as they say, good news and bad news.
The not-so-good news – if you can call it that – is that the lithofoil process adds about 50 percent to your average four-color offset printing cost. Makeready takes about twice as long, and then there is the cost of the foil.
But, and here is the good news, the process allows for a mega-multitude of metallic colors, that you could not achieve with foil stamping (and you have the tooling cost there to consider) and runs around 30 percent less than utilizing foil laminated paper, and … it is 100 percent recyclable, which cannot be said for every foil.
Granted, this is not a process for 500 letterheads. But, for outstanding packaging, collateral or direct-mail pieces in larger quantities, this is definitely an option to consider and makes your creative heart beat faster.
If it’s good enough for Apple, Bare Essentials, and Ghirardelli, to name a few of Spectrum Lithograph’s clients that utilize the process, it will do just fine for you and me. 😉
The sky – or better said your metallic imagination – truly is the limit.
[youtube=https://www.youtube.com/watch?v=OTRv4VpMm_Q]
If you are a PaperSpecs Pro member, and missed requesting the set of wrapping paper we gave as Valentine’s gifts, it’s not too late. Simply log in and select “Mill Promotions” and click on the words “Set of Valentine Wrapping Paper.”
——————–
Seeing designers worldwide struggle to stay current with new papers and paper trends inspired Sabine Lenz to create PaperSpecs, an independent and comprehensive Web-based paper selection tool and weekly e-newsletter. Growing up in Germany, she started her design career in Frankfurt, before moving on to Australia and the United States. Lenz worked on design projects ranging from corporate identities to major road shows and product launches. From start-ups to Fortune 500 companies, her list of clients included Oracle, Sun Microsystems, Deutsche Bank, IBM and KPMG. Lenz is a noted speaker and author on paper issues and educational topics related to the paper industry.
Copyright 2012 PaperSpecs.com